
How do I manage user groups on Signite?
Signite provides two ways to manage your user groups, either directly from the interface (Subject 1), or by synchronizing your groups from Google Workspace (Subject 2).
Use the following steps to set up groups on your account:
1. Adding and Managing Groups on Signite
1.1. Add a new Group
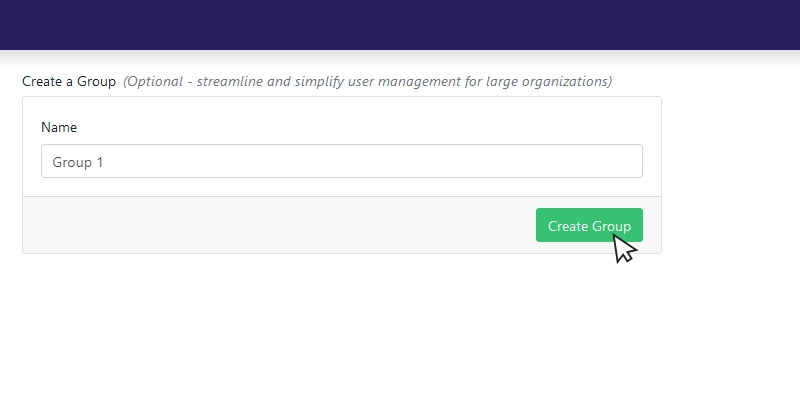
Go to the Groups window on the left menu, and under the Create a Group field, put the name of the group. Click the Create Group button in order for the group to be added.
1.2. Set up different groups to make it easier to manage users from your account.
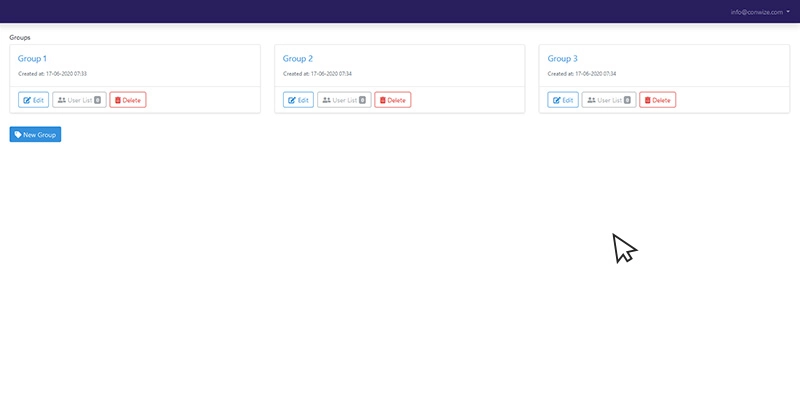
After adding one group, you can use the New Group button to add additional groups as neccessary.
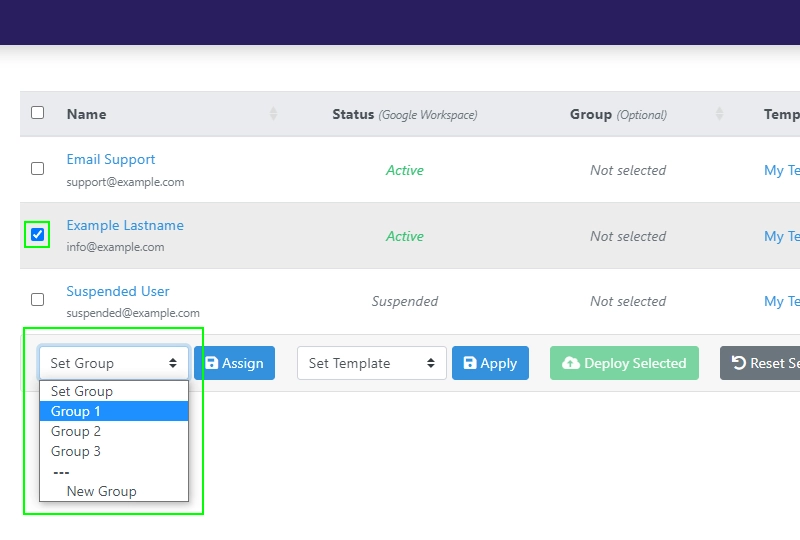
Once you’ve created the groups you need, you can assign them to specific user via the users screen,
or on the individual user’s editing screen.

2. Adding and Synchronizing Google Workspace Groups with Signite
Follow these steps if you have already managed groups on your Google Workspace account, and want to use them instead of Signite’s groups.
2.1. Make sure Signite has permissions to see and sync groups
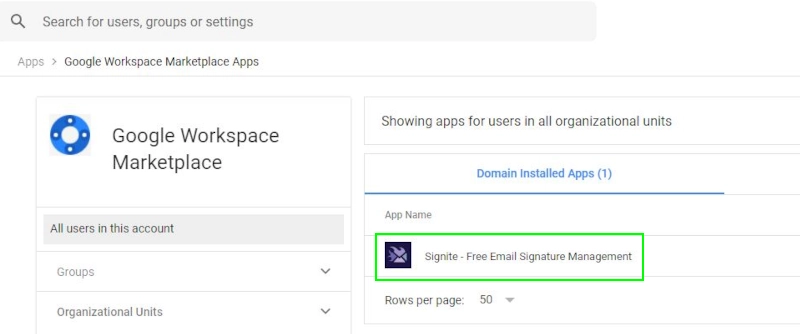
Before synchronizing your Google Workspace groups with Signite, go to your Google Workspace account, and in the menu, go to Apps -> Google Workspace Marketplace apps -> Apps list, and under the Domain Installed Apps choose the Signite App From the list.
Under Data Access, if not all permissions are granted, choose Grant access and make sure all relevant permissions are granted.

Once permissions are granted, you can move forwards and sync your groups with Signite.
2.2. Activate Google Workspace group Synchronization
In order to use your Google Workspace groups on Signite, activate the option on your account, under the Account Settings.
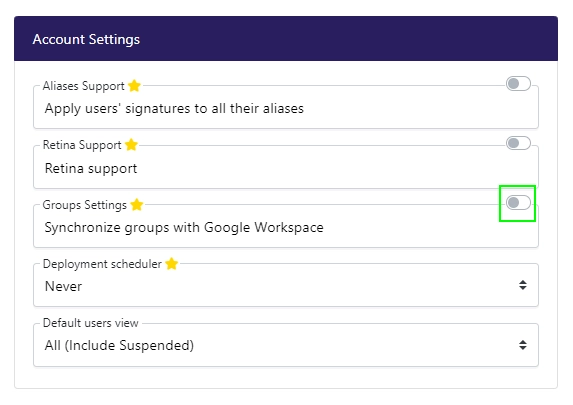
Once the option is activated, your Google Workspace groups will be synchronized with Signite, and all users will be assigned groups based on the setup in Google Workspace.
Any groups you’ve managed previously on Signite will be hidden and removed from the users.
Empty Google Workspace groups, with no user assigned to them, will not be shown on Signite after synchronization.
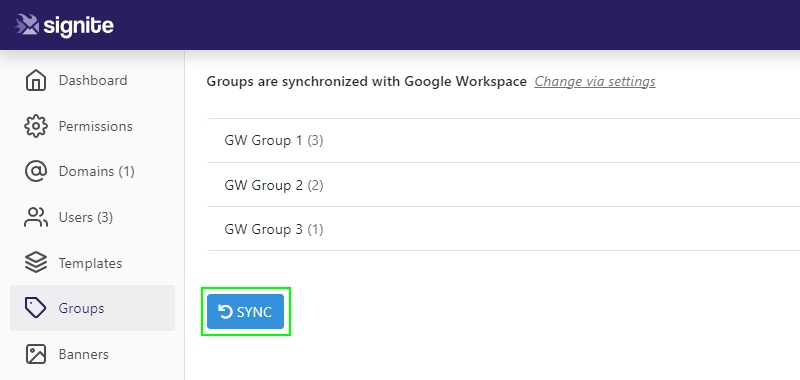
2.3. Synchronize changes to the Google Workspace groups
Updating changes to the groups made on your Google Workspace account, including adding and removing groups and assigning groups to users, can be done by going to the Groups screen and choosing the SYNC button under the group list.
2.4. Reverting back to Signite’s group management
At any point you can revert back to managing groups in Signite by unchecking the Synchronize groups with Google Workspace checkbox on the Account Settings menu in the account screen.
You can also Synchronize your Google Workspace Custom Attribute with Signite.
Follow this guide for more information:
https://www.signite.io/guides/google-workspace-custom-attributes-integration/
If you have any questions, please contact us at support@signite.io