
Manage And Display Google Workplace Custom Attributes In Your Signatures
Signite allows signature information management directly from the Singite interface or from Google Workspace.
Additional Custom attributes can be used instead of the default ones Google Workspace provides, and Signite gives the option to synchronize them and overwrite existing fields with their values.
The following steps will help explain how to make sure the app permissions are correct, assign an attribute overwrite, and use the information in your signatures.
Note: To sync the custom attribute with Signite you must make sure to set up the Custom Attribute before hand.
1. Set up the Custom Attributes on your Google Workspace Account
2. Allow the Signite app to use the Custom Attributes Scheme
3. Sync Google Workspace Custom Attributes with Signite
4. Add and overwrite fields on Signite
5. Applying changes made after setting up and deploying the Custom Attributes
1. Set up the Custom Attributes on your Google Workspace Account
Before syncing your custom attributes, you should first define them on your Google Workspace account, and assign their types and values accordingly.
- Note: All attributes you wish to synchronize must be set up as “Single Value“.
- The attribute types relevant to email signatures are “Text” and “Phone“, where a Text attribute can be used for a variety of information such as Job Title, Department, Post Nominals, Gender Pronouns and more.
- Signite allows the following fields to be replaced by Custom Attributes set up on Google Workspace:
- Post Nominals
- Pronouns
- Job Title
- Department
- Mobile
- Make an appointment
- Additional Phones
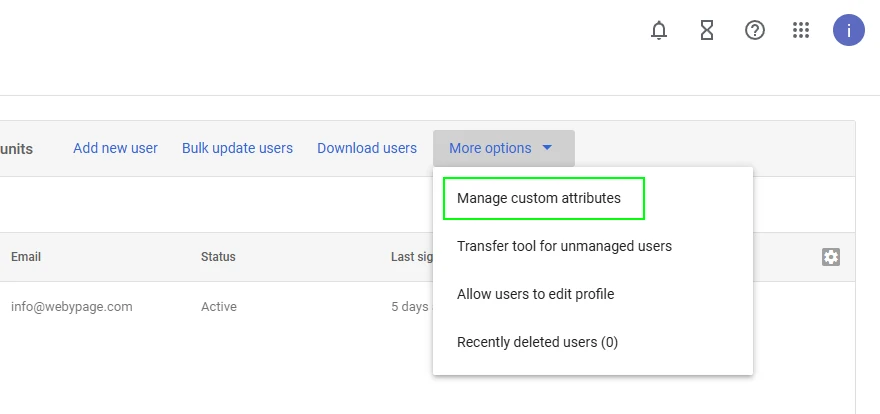
To create a custom attribute, go to your Google Workspace account, and under the Users screen, got to More options -> Manage custom attributes
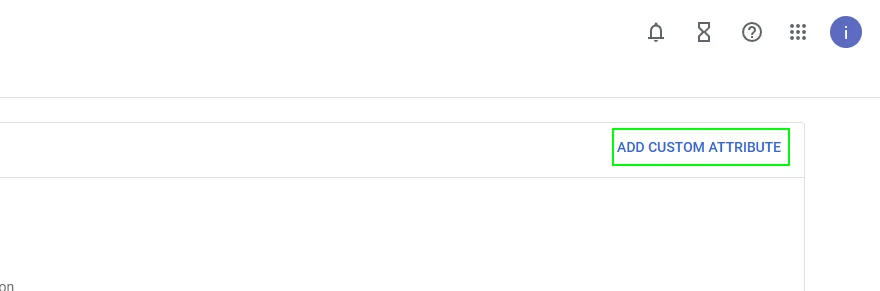
In the new screen, go to Add Custom Attribute at the top right corner
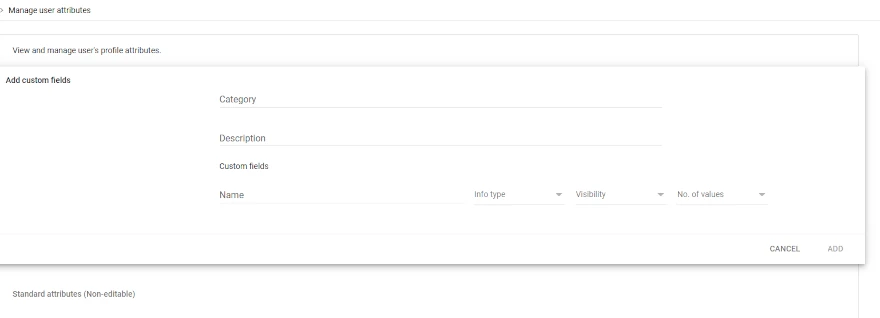
This will open an editing section where you can set up a new custom attributes group.
Here you can assign an attribute group name, and create as many custom attributes as necessary.
Please assign each attribute with:
- Name: will be used to find the attribute in Signite
- Info Type: the type of info you can enter in the attribute for each user. Please set it as Text unless otherwise specified.
- Visibility: who can edit this field and see it? Change as necessary for your own organization.
- No. of values: how many values can be entered in the field per user. Important to set it as Single Value for synchronization into Signite.
Save the changes and go to your users screen.
For each user, go to User information, and at the bottom you’ll see your new custom attributes group.
Enter the relevant information and save the changes.
2. Allow the Signite app to use the Custom Attributes Scheme
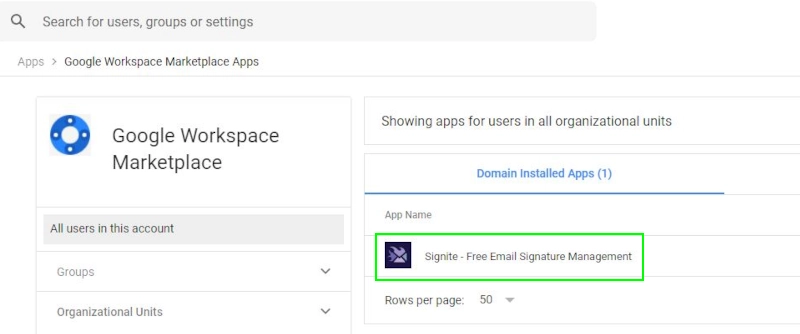
Go to your Google Workspace account, and in the menu, go to Apps -> Google Workspace Marketplace apps -> Apps list, and under the Domain Installed Apps choose the Signite App From the list.
Under Data Access, if not all permissions are granted, choose Grant access and make sure all relevant permissions are granted.
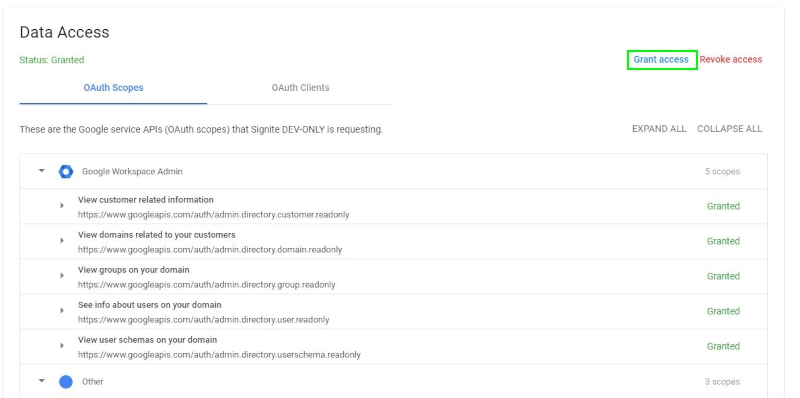
Once permissions are granted, you can move forwards and sync your attributes with Signite.
3. Sync Google Workspace Custom Attributes with Signite
If you’ve yet to incorporate the attributes in your signatures, you’ll first need to synchronize your attributes with Signite.
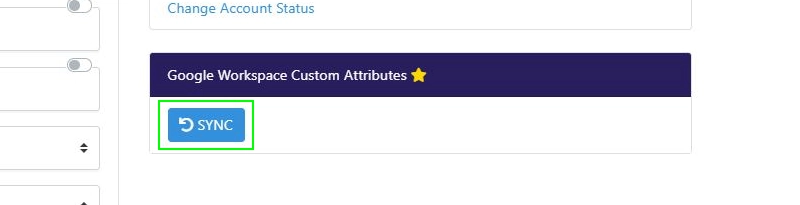
To do that, go to the account screen, under the Google Workspace Custom Attributes, use the Sync button.
If any change is made to the attributes on Google Workspace, an additional synchronization is required before the new changes take effect on Signite.
4. Add and overwrite fields on Signite
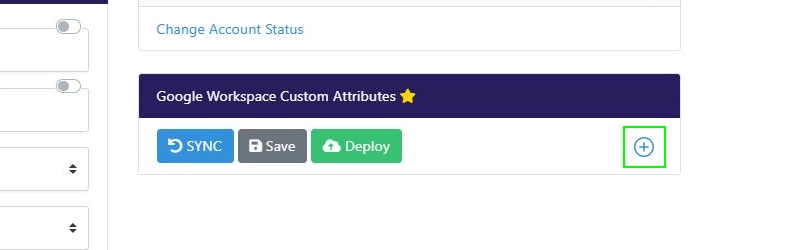
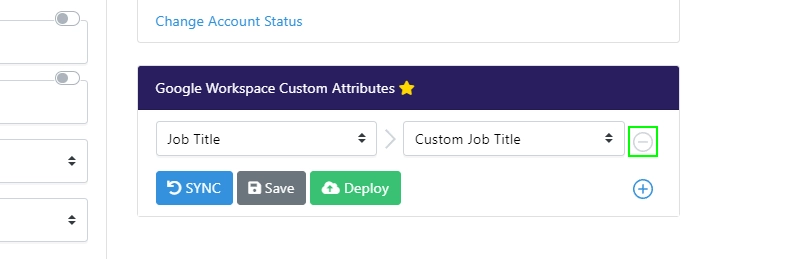
After the initial synchronization, new buttons will appear next to the Sync button.
The Save button allow you to save changes without deploying the changes to your users, while the Deploy button will deploy the changes to your users’ signatures.
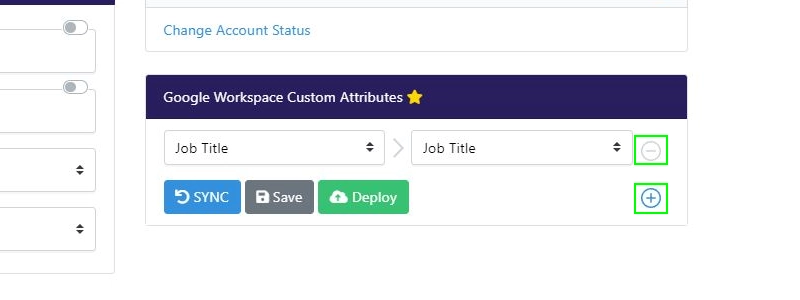
Click the + icon to add an attribute from Google Workspace and assign it to an existing field on Signite, to overwrite its data.
In the new option, choose the existing field you’d like to overwrite with your attribute from the Choose Signite field drop down menu.

Next, choose the relevant attribute from the Choose Custom field drop down menu, which is populated with all custom attributes Signite synchronized from your Google Workspace account.
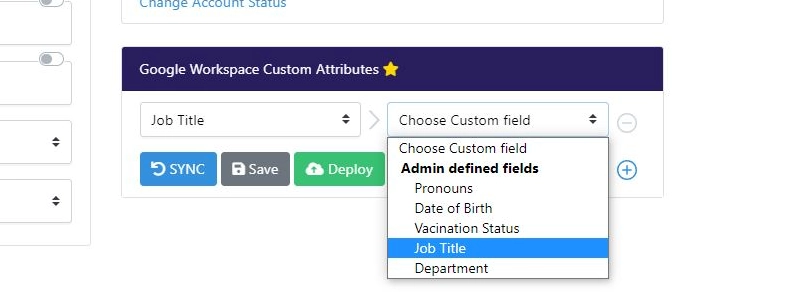
You can now add more fields, or remove those you’ve already set up, by using the + and – buttons next to the fields.
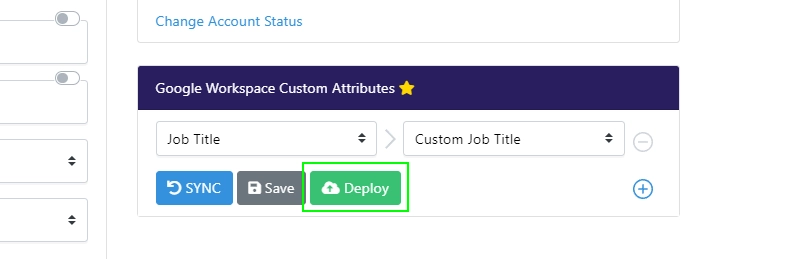
When you’re done, save your progress by using the Save button.
Press the Deploy button for the changes to take effect.
The new attribute and its value for each user will now overwrite the chosen existing fields on your signatures, and re-deploy all currently deployed users with the up to date information.
Please note: Overwriting the information you’ve added in Signite with the Google Workspace information is irreversible. You can, however, remove changes made by the custom attributes values by removing the connection between the custom attribute and the Signite field.
5. Applying changes made after setting up and deploying the Custom Attributes
5.1. Attribute values and information changes
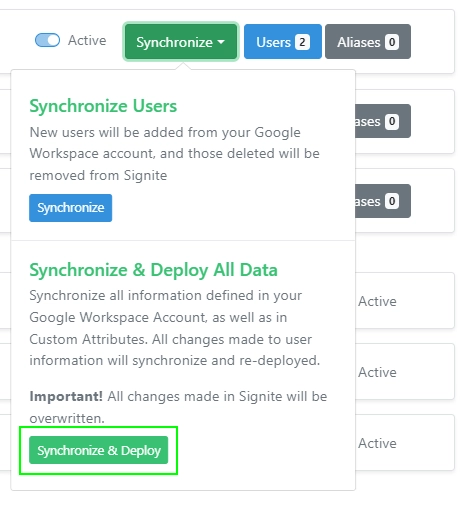
In case of changes to the custom attribute values, with no change to the type of attribute or the schemas, you can update the changes by re-synchronizing and re-deploying the information via the Deploy button under the Google Workspace Custom Attributes module in the Account Settings screen,
or via the Synchronize & Deploy All Data button on the Domains screen.
5.2. Changes to the type of field and/or their values
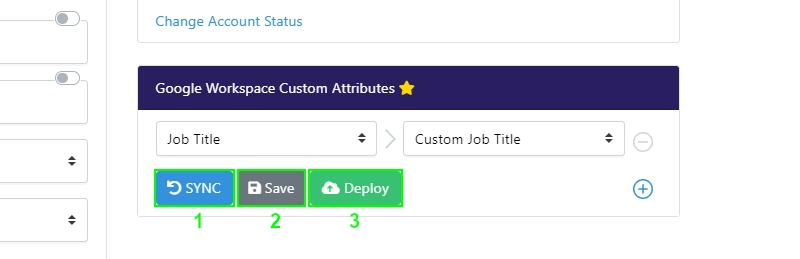
If the type of attribute has changed on Google Workspace, or you’ve added or removed attributes from the schema, including their values, you must first sync the custom attributes by using the SYNC button, then update and save the fields on Signite.
Following that, you’re free to deploy the new data via the Deploy button.
5.3. Removal of a Custom Attribute integration
If you wish to remove the Custom Attribute data from one or more fields, you can remove it and re-sync the information from the default Google Workspace attributes, or manage it directly from Signite.
To do that, remove the overwriting field from the custom attribute management in the account settings, save the changes, go to the Domains screen and choose Synchronize & Deploy All Data.
Note that if you do not have a corresponding default Google Workspace attribute, the field will be empty, and available to manage directly from Signite.
You can also Synchronize your Google Workspace user groups with Signite.
Follow this guide for more information:
https://www.signite.io/guides/groups-synchronization/
After making any changes, make sure to refresh your Gmail screen to see the updated version.
If you have any questions, please contact us at support@signite.io