

How do I give another user basic permissions to edit and deploy signatures?
Before creating a new role, the Super Admin needs to install and synchronize Signite on Google Marketplace.
How to install the Signite app
Creating an admin role
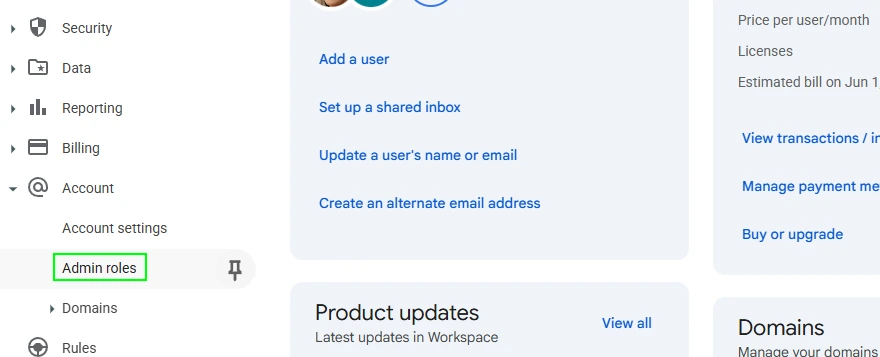
1. In your Admin Console, click on Account -> Admin roles
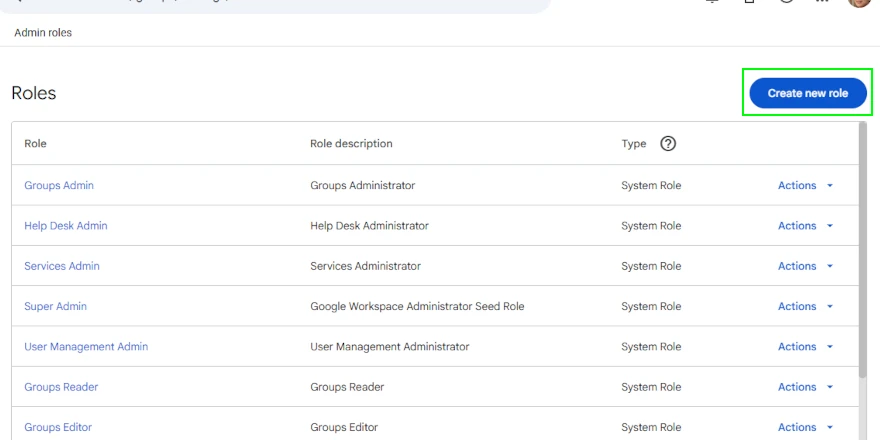
2. Create a new role
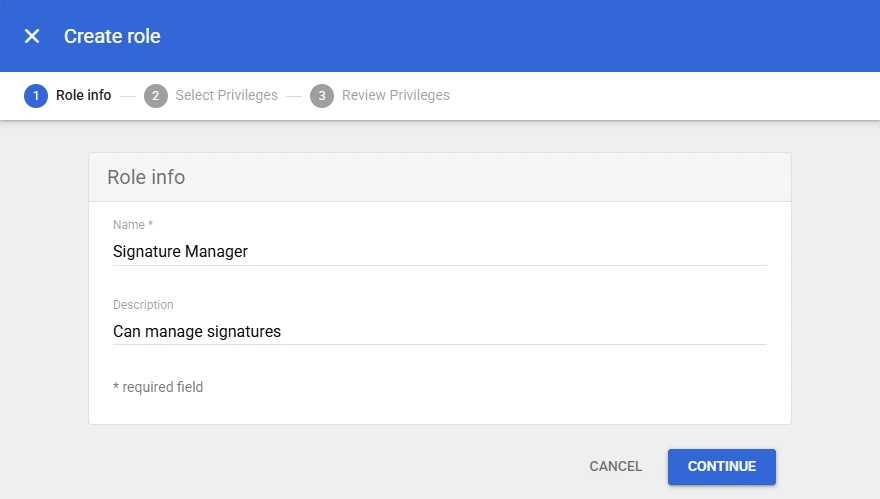
3. Fill in the appropriate role name and description, and press Continue.
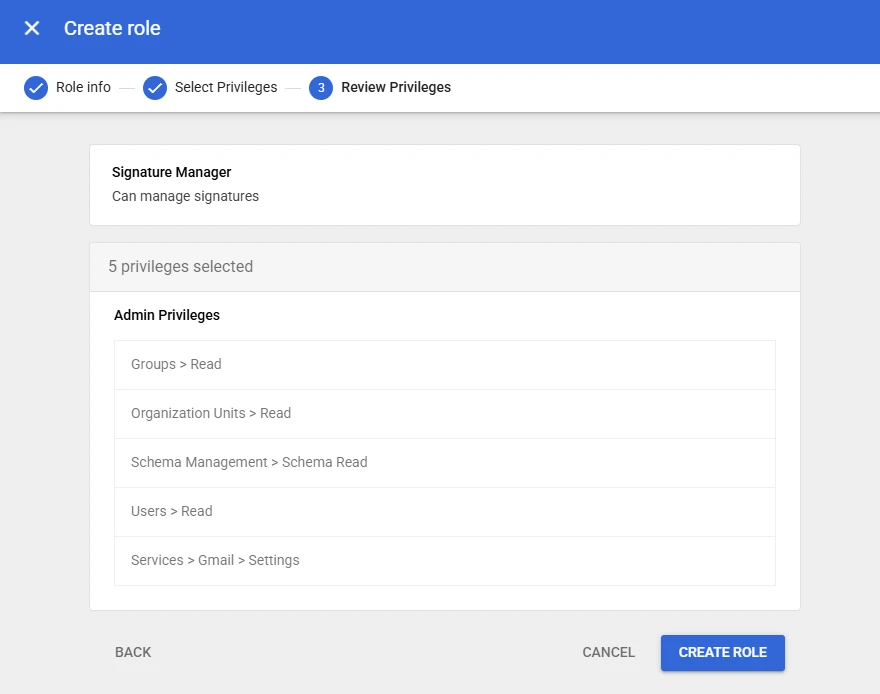
4. Under Privileges, select the following 5 privileges:
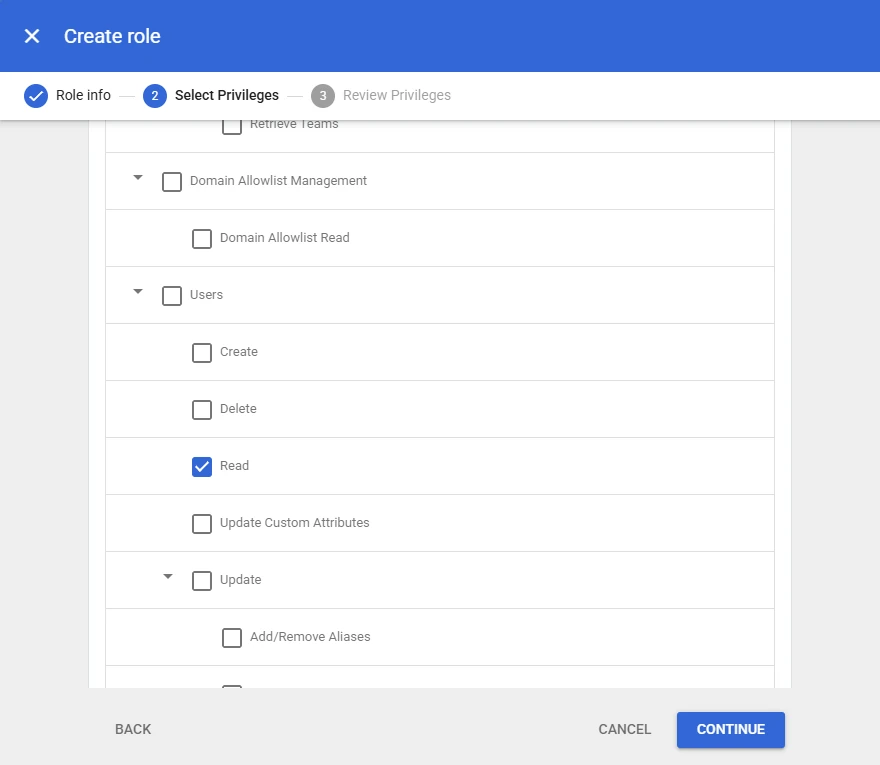
4.1 Admin Privileges > Groups > Read
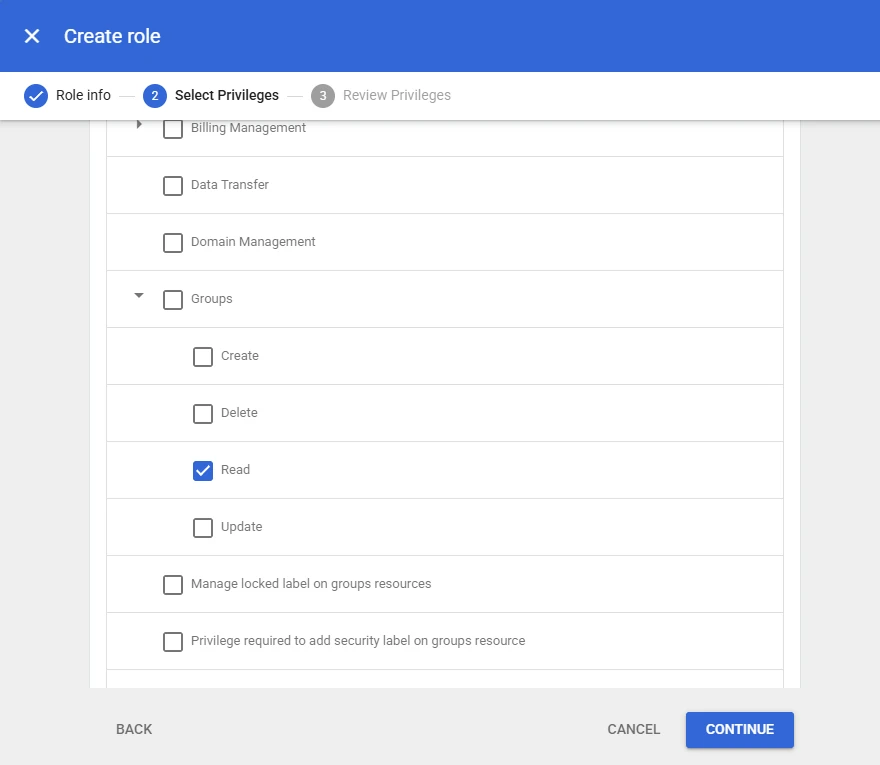
4.2+3 Admin Privileges > Organizational Units > Read
Admin Privileges > Schema Management > Schema Read
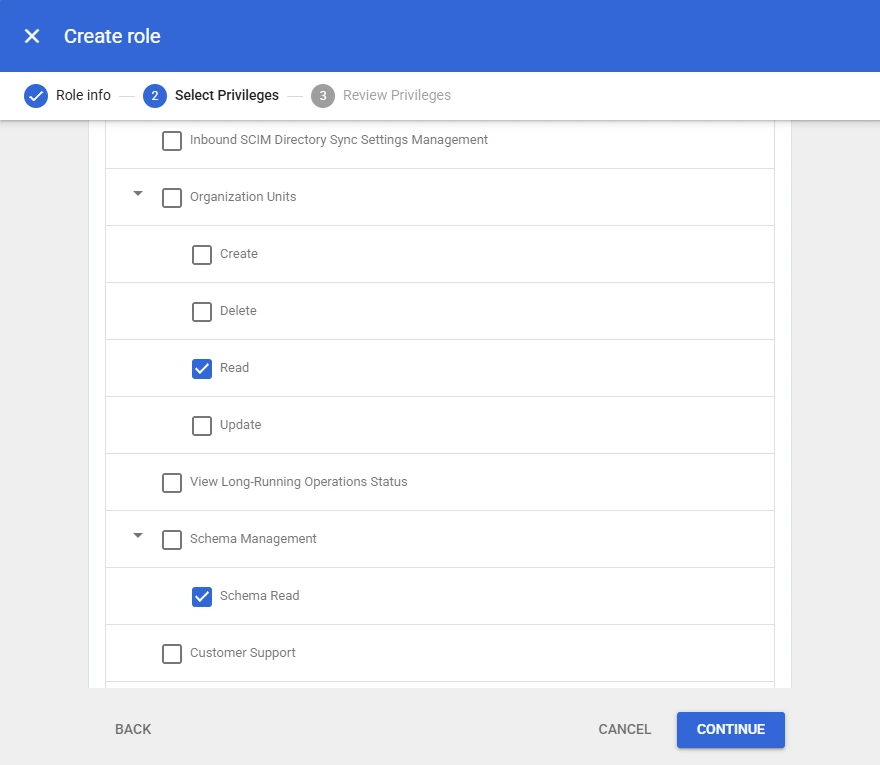
4.4 Admin Privileges > Users > Read
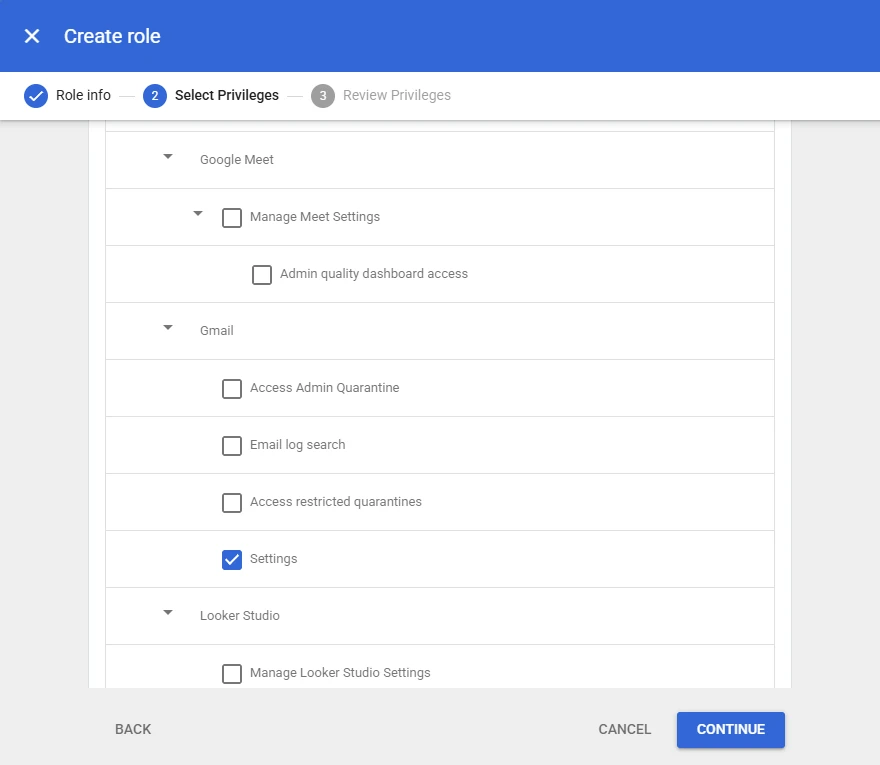
4.5 Admin Privileges > Services > Gmail > Settings
5. After pressing Continue, review the new role, and press Create Role
6. In the new role’s settings window, press Assign role.
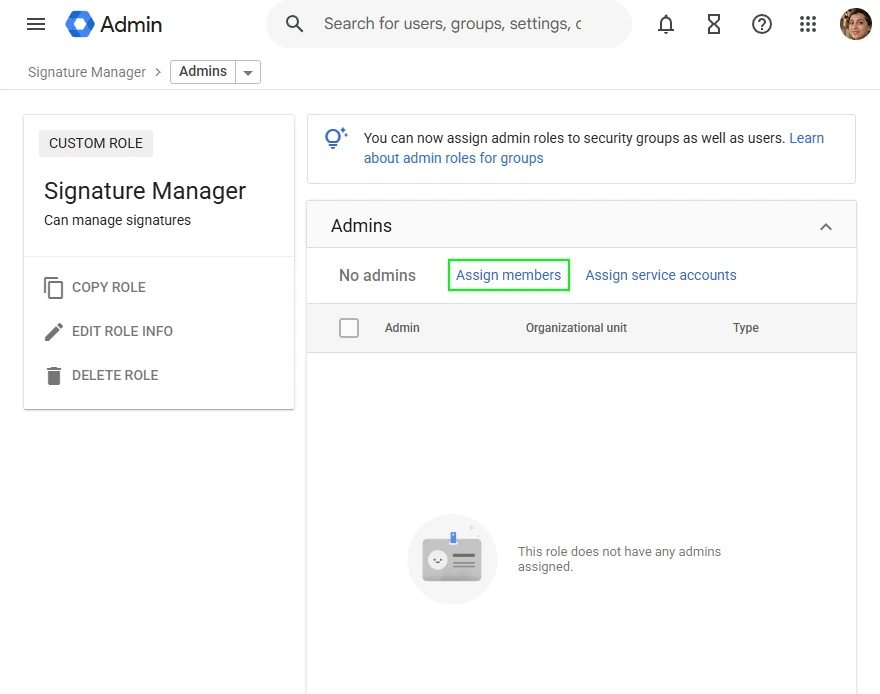
7. Find and select the appropriate user for the role, and press Assign role
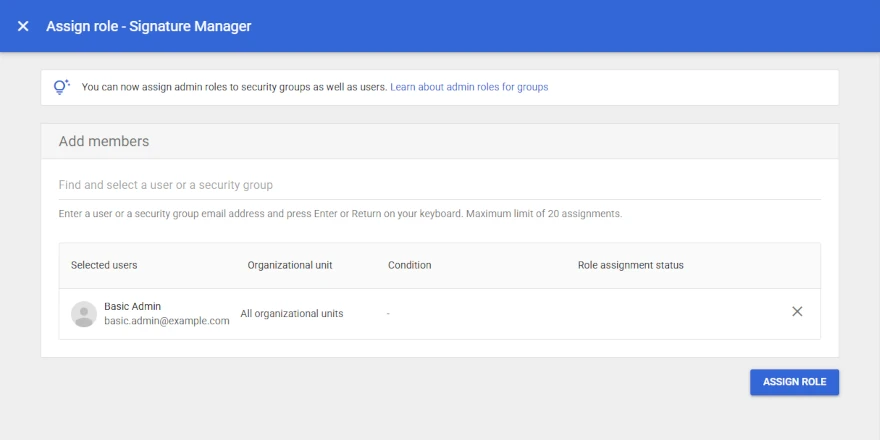
8. Once the role is assigned, the user can edit, manage and deploy Signite’s signatures to all other users on the Google Workspace account.
Attention: Changing the user’s permission role may take a few minutes or more to take effect on Google Workspace, therefore, it’s recommended that you wait for a while after assigning the permission before trying to login with the user to Signite.
—
Admin role with full permissions
If you need to give access to domain and full user information editing capabilities on Google Workspace (in addition to managing signatures on Signite), please follow this guide: How do I give another user permissions to edit and deploy signatures?